Azure Linux VM: A Practical Tutorial
If you're tasked with setting up a Linux environment on Azure for the first time, here is the actual deployment path without the marketing fluff.
Step-by-Step VM Deployment
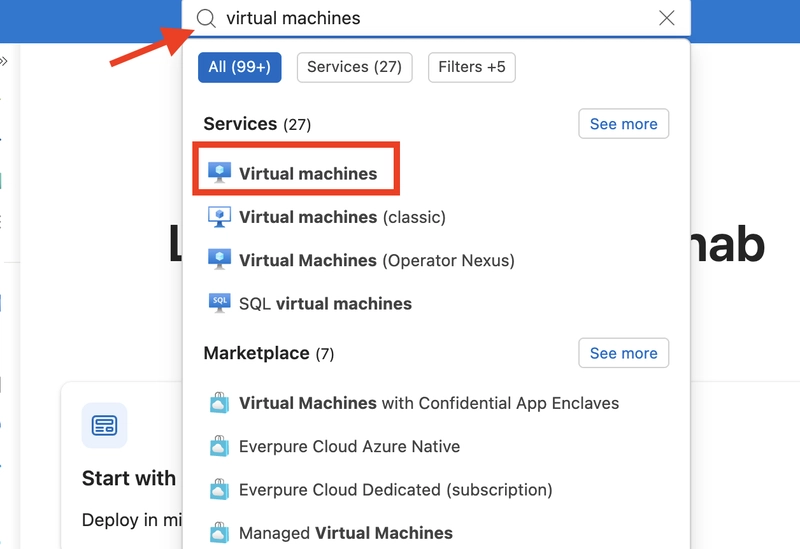
1. Access the Portal: Log into the Azure Portal and search for Virtual Machines.
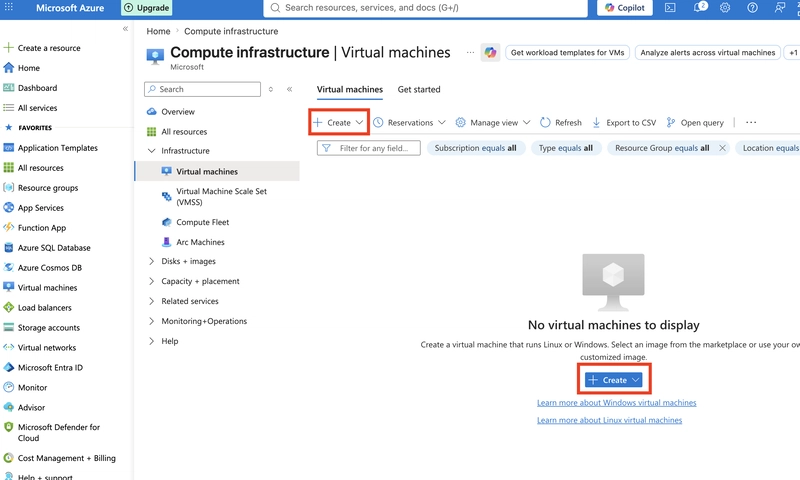
2. Initiate Creation: Hit + Create. You'll start in the Basics tab.
3. Organization: Create a new resource group (e.g., Dev-Test-RG). This is critical; if you don't group your resources, cleaning up your bill later becomes a nightmare.
4. Instance Config: Name your VM and select a region physically close to your office to avoid annoying latency.
5. Availability & Security: For a basic dev environment, select No availability option and Standard security. You don't need high-availability redundancy for a test box.
6. OS Image: Select Ubuntu. It's the standard for a reason—most documentation actually works for it.
7. Sizing: Leave the architecture and size at default unless you know exactly why you need more RAM.
8. Auth: Choose Password for the administrator account if you're just starting out, though SSH keys are technically the "correct" way for production.
9. Port Rules: In the Inbound Port Rules, ensure SSH (22) is open so you can actually get into the machine. Open HTTP (80) only if you're hosting a web service.
10. Optimization: Go to the Monitoring tab and disable boot diagnostics to keep things lean.
11. Networking: Under the Networking tab, create a new Virtual Network (e.g., Linux-VNet).
The transition to IaaS generally speeds up the provisioning phase—you get a server in minutes instead of waiting weeks for hardware procurement—but the "hidden" cost is the configuration time. You still have to manage the OS, patch it, and secure it. It's not "zero maintenance"; it's just "different maintenance."