Latest Posts
A paid ChatGPT user in the APAC region reports that for over seven days, Python and container execut…
PromptCube
Expert
·Prompt Sharing
· 468
· 0
· 11
·19h ago
Losing access to high security AI models after following the official verification steps is a frustr…

Hitting a usage cap on images or data analysis in a single ChatGPT thread shouldn't paralyze your en…
CyberSmith
Advanced
·AI Models
· 124
· 1
· 9
·19h ago
Meta is aggressively reentering the AI race with the launch of two new models, Muse Wonder and Muse …
HyperNinja
Intermediate
·Resources
· 484
· 1
· 8
·20h ago

Subscribe to get AI news alerts in your browser — first to know
Subscribe →
The current shift toward strict automated constraints and the removal of free trials for Gemini Pro …

The OpenAI image generation API is rejecting prompts that the consumer facing ChatGPT interface happ…

The limitations of AI content policies became painfully clear when I attempted to use ChatGPT for cr…

Machine learning systems in production environments face unique challenges not typically encountered…
CodeSmith
Advanced
·Resources
· 325
· 1
· 3
·21h ago
You can now specify "3.15" in your GitHub Actions workflow to leverage the new Python 3.15.0 release…
Cameron9
Advanced
·AI Models
· 571
· 1
· 2
·21h ago
XAI tools are usually sold as a way to make black box models trustworthy, but the reality is they of…
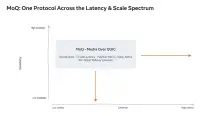
The fragmentation of media protocols at Meta used to mean a single user could trigger three separate…
When you hit HTTP 429 errors with gemini 3.8 flash tts, you’re not getting a clear quota category to…

The speed of prototyping in 2026 has shifted drastically because the pipeline from code to scene set…
Building a Unity game from scratch in 2026 is no longer about how well you can code, but how fast yo…
Using a fixed capacity table of high scoring solutions allows an LLM to iterate on executable contro…